|
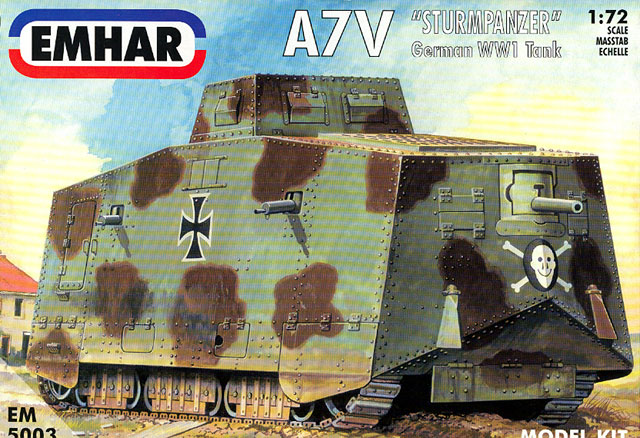
A7V Sturmpanzer
1/72 Scale German
WWI Tank
Emhar

Emhar's 1/72 scale A7V is available online from Squadron.com
S u m m a r y |
| Catalogue
Number: |
EM5003 |
| Scale: |
1/72 |
| Contents and
Media: |
Each |
| Price: |
USD$9.96
from Squadron.com |
| Review
Type: |
First Look |
| Advantages: |
Ultra-simple parts
breakdown; crisp detail; four nice marking options; excellent
fit; moving guns; minimal moulding flaws; plastic is pleasant
and easy to work with. |
| Disadvantages: |
Location of some parts is
vague; some detail (especially underneath) simplified or missing |
| Recommendation: |
Recommended
|
Reviewed by Brett Green
The recent resurgence of small scale armour kits has
been appreciated by modellers and wargamers alike. As the range of
1/76 and 1/72 scale kits increase, it seems that the parts count of
each model goes up correspondingly. It is not unusual to see a newly
released 1/72 scale tank model, with link-and-length tracks and
detailed suspension, comprising 200 parts or more.
While this is undoubtedly a good thing for detail,
some modellers may be frustrated by hundreds of tiny parts.
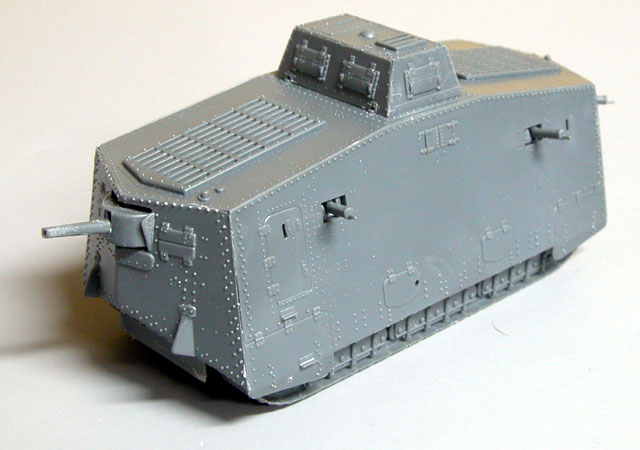
Emhar's new 1/72 scale A7V Sturmpanzer will be
warmly welcomed by these modellers. This kit will never be accused
of being overly complicated. Two sprues contain just 30 parts in
dark grey, injection moulded plastic.
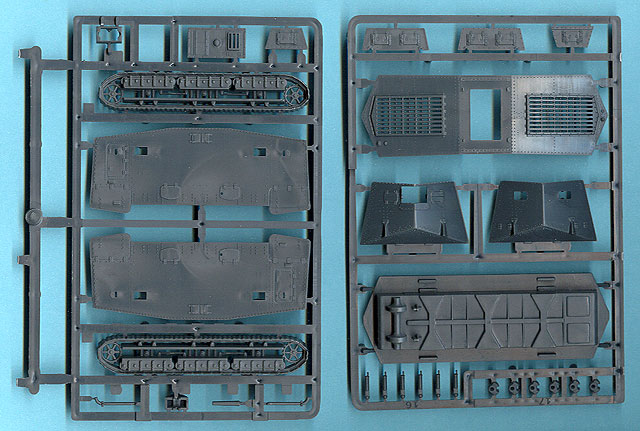
Surface detail is very good. The panel lines for
doors and armoured flaps are engraved, while other features such as
rivets, hinges and vents are appropriately raised.
The first thing to grab my attention was the
one-piece suspension and track units for each side. Although these
are largely hidden by the superstructure Ehmar has done a good job
with detailing the running gear, tracks and sprockets. The fact that
they have achieved this on a single part is quite remarkable.
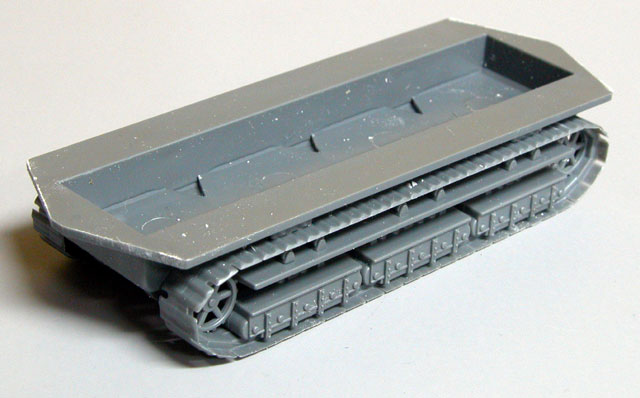
The lower hull is supplied as a single part, while
the superstructure must be assembled from separate pieces. Each
major piece is bevelled on the edge and the top to simplify
alignment with its neighbors. The lower hull includes side sponsons
which block off the interior of the superstructure. This is
especially important as the top of the superstructure features large
vents which are open to the interior. Any gaps in the lower hull
would be visible from the top of the completed model if the sponsons
were not blocked off.
 The
lower hull also has the centre section of (what I assume to be) the
final drive moulded in place. Curiously, the short axles that should
logically join the sprockets with this final drive are not supplied.
The result is that the drive sprockets and idler wheels are
miraculously suspended in mid air! Fortunately, this is only obvious
if you are viewing the model from underneath. The
lower hull also has the centre section of (what I assume to be) the
final drive moulded in place. Curiously, the short axles that should
logically join the sprockets with this final drive are not supplied.
The result is that the drive sprockets and idler wheels are
miraculously suspended in mid air! Fortunately, this is only obvious
if you are viewing the model from underneath.
The remaining pieces make up the machine guns, main
gun and the box on top of the main superstructure.
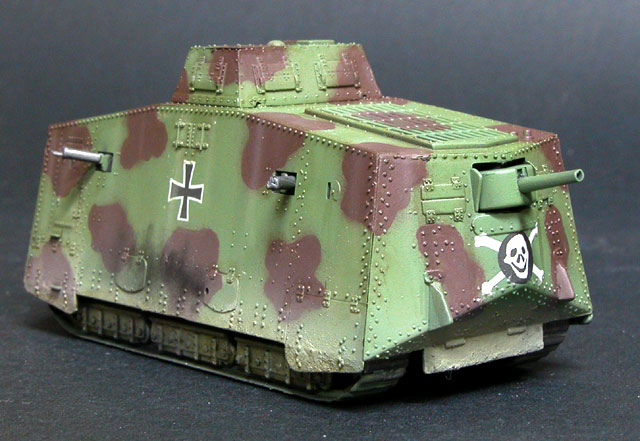
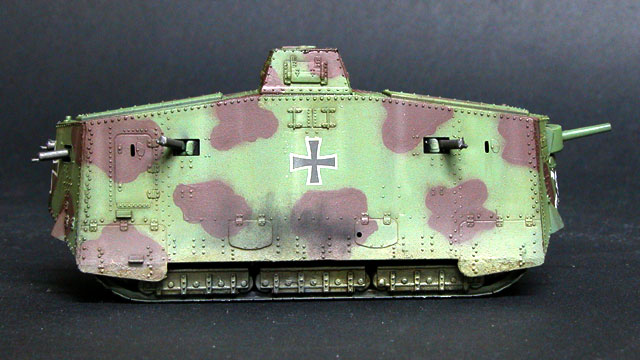
Markings are supplied for four vehicles. These all
include artwork or individual names. The colour schemes add more
interest. They all include a large mottled finish over a base green
colour.
Instructions are called out over eight construction
steps. Diagrams are used exclusively. A few notes might have been
helpful.
I liked the look of this kit and, considering its
simplicity, I decided to build it straight away.
The plastic was very pleasant to work with and easy
to clean up. With the major parts removed from the sprues, I had
some trouble figuring out which side was which for the suspension
units. My second problem (and, as it turns out, my last problem) was
working out the exact positioning of the suspension units on the
lower hull. I eventually decided to centre them on the hull. This
worked out okay.
I deviated from the suggested construction sequence
and added the machine guns to the superstructure parts before they
were glued to the hull. Although the instructions do not mention it,
the six machine guns can remain workable by simply snapping them
into their mounts, and snapping the mounts into the holes in the
superstructure. The mounting method is quite secure - there is
minimal risk of pushing the guns back into the sealed vehicle after
the model is finished.
With the weaponry in place I added the front and
rear superstructure walls, followed by one sidewall. I added the
sidewall before the cement had dried on the end pieces so that I
could adjust the alignment. The second sidewall was installed, and
the superstructure edges were taped with Tamiya masking tape.
While I was waiting for this main assembly to set, I
constructed the armoured box on top of the superstructure. The edges
of these parts were bevelled too, and the sub-assembly was quickly
finished.
The last major part was the superstructure roof. I
thinned down the inside edges of the roof at the front and rear,
just in case. After dry-fitting, I applied glue and pressed the
piece in place.
The fit of all the superstructure parts was close to
perfect. I only needed to add a few spots of Mr Surfacer to address
some tiny gaps that I had missed.
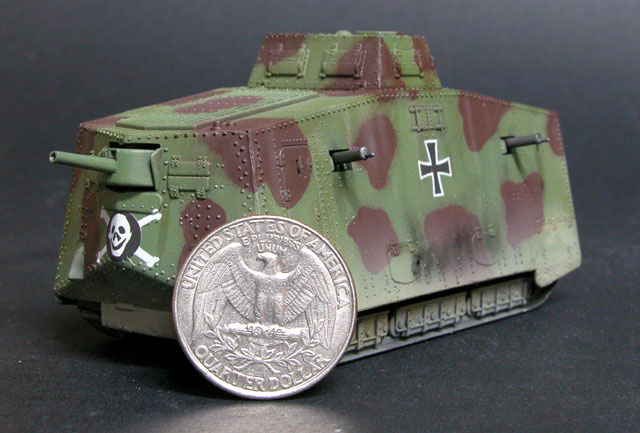
The A7V was an important step in the evolution of
the armoured fighting vehicle. It is nice to see it available in
this scale. It was a big vehicle and is a decent sized model at
around 4" long even in this scale. In fact, it is not much
smaller than the Tristar Panzer I Ausf. A that I built last month.
Emhar has managed to produce a nicely detailed kit
with an impressively small number of parts. The suspension is
especially simple. Not only that, the fit of the parts is excellent,
although you might have to juggle with the superstructure parts
somewhat.
The total time for construction was less than two
hours. I look forward to painting this beastie on the weekend!
Recommended.
Thanks to
Squadron.com for the review sample.
Model, Review and Images Copyright © 2002 by
Brett Green
Page
Created 09 October, 2002
Last updated
22 July, 2003
Back to HyperScale Main
Page
Back to Reviews
Page
|  Home | What's
New | Features
| Gallery |
Reviews | Reference
| Forum
| Search
Home | What's
New | Features
| Gallery |
Reviews | Reference
| Forum
| Search